Beginnerbakes

Pies & Tarts

No-Bake Mango Coconut Chia Pudding Tart Recipe

By Beginnerbakes Test KitchenReviewed by Beginnerbakes Editorial TeamPublished Apr 1, 2026 · Updated Jul 11, 2026
Tropical Fusion 15 mins beginner-friendlyeasyno-bakehealthy dessertvegangluten-freesummer dessertfruit tartdairy-freechia puddingparty dessertminimal ingredientsstep-by-step

Discover this easy no-bake mango coconut chia pudding tart made with gluten-free oats, creamy coconut milk, and fresh mango slices. A healthy, vegan, and gluten-free dessert ideal for summer gatherings and beginner bakers seeking a refreshing treat.

No-Bake Mango Coconut Chia Pudding Tart Recipe
Prep 15 min
Cook 0 min
Total 15 min
Servings 8
Difficulty easy
Cuisine Tropical Fusion

Recipe Details

Prep15 min
Cook0 min
Total15 min
Servings8
Difficultyeasy
CuisineTropical Fusion
Add To Favorites

Ingredients

Servings 8
  • 1 1/2 cups gluten-free rolled oats
  • 1/2 cup shredded unsweetened coconut
  • 3 tablespoons coconut oil, melted
  • 2 tablespoons maple syrup or agave nectar
  • 1 cup canned full-fat coconut milk, well stirred
  • 1/4 cup chia seeds
  • 2 tablespoons maple syrup (for pudding)
  • 1 teaspoon vanilla extract
  • 1 large ripe mango, peeled and thinly sliced
  • Fresh mint leaves (optional, for garnish)
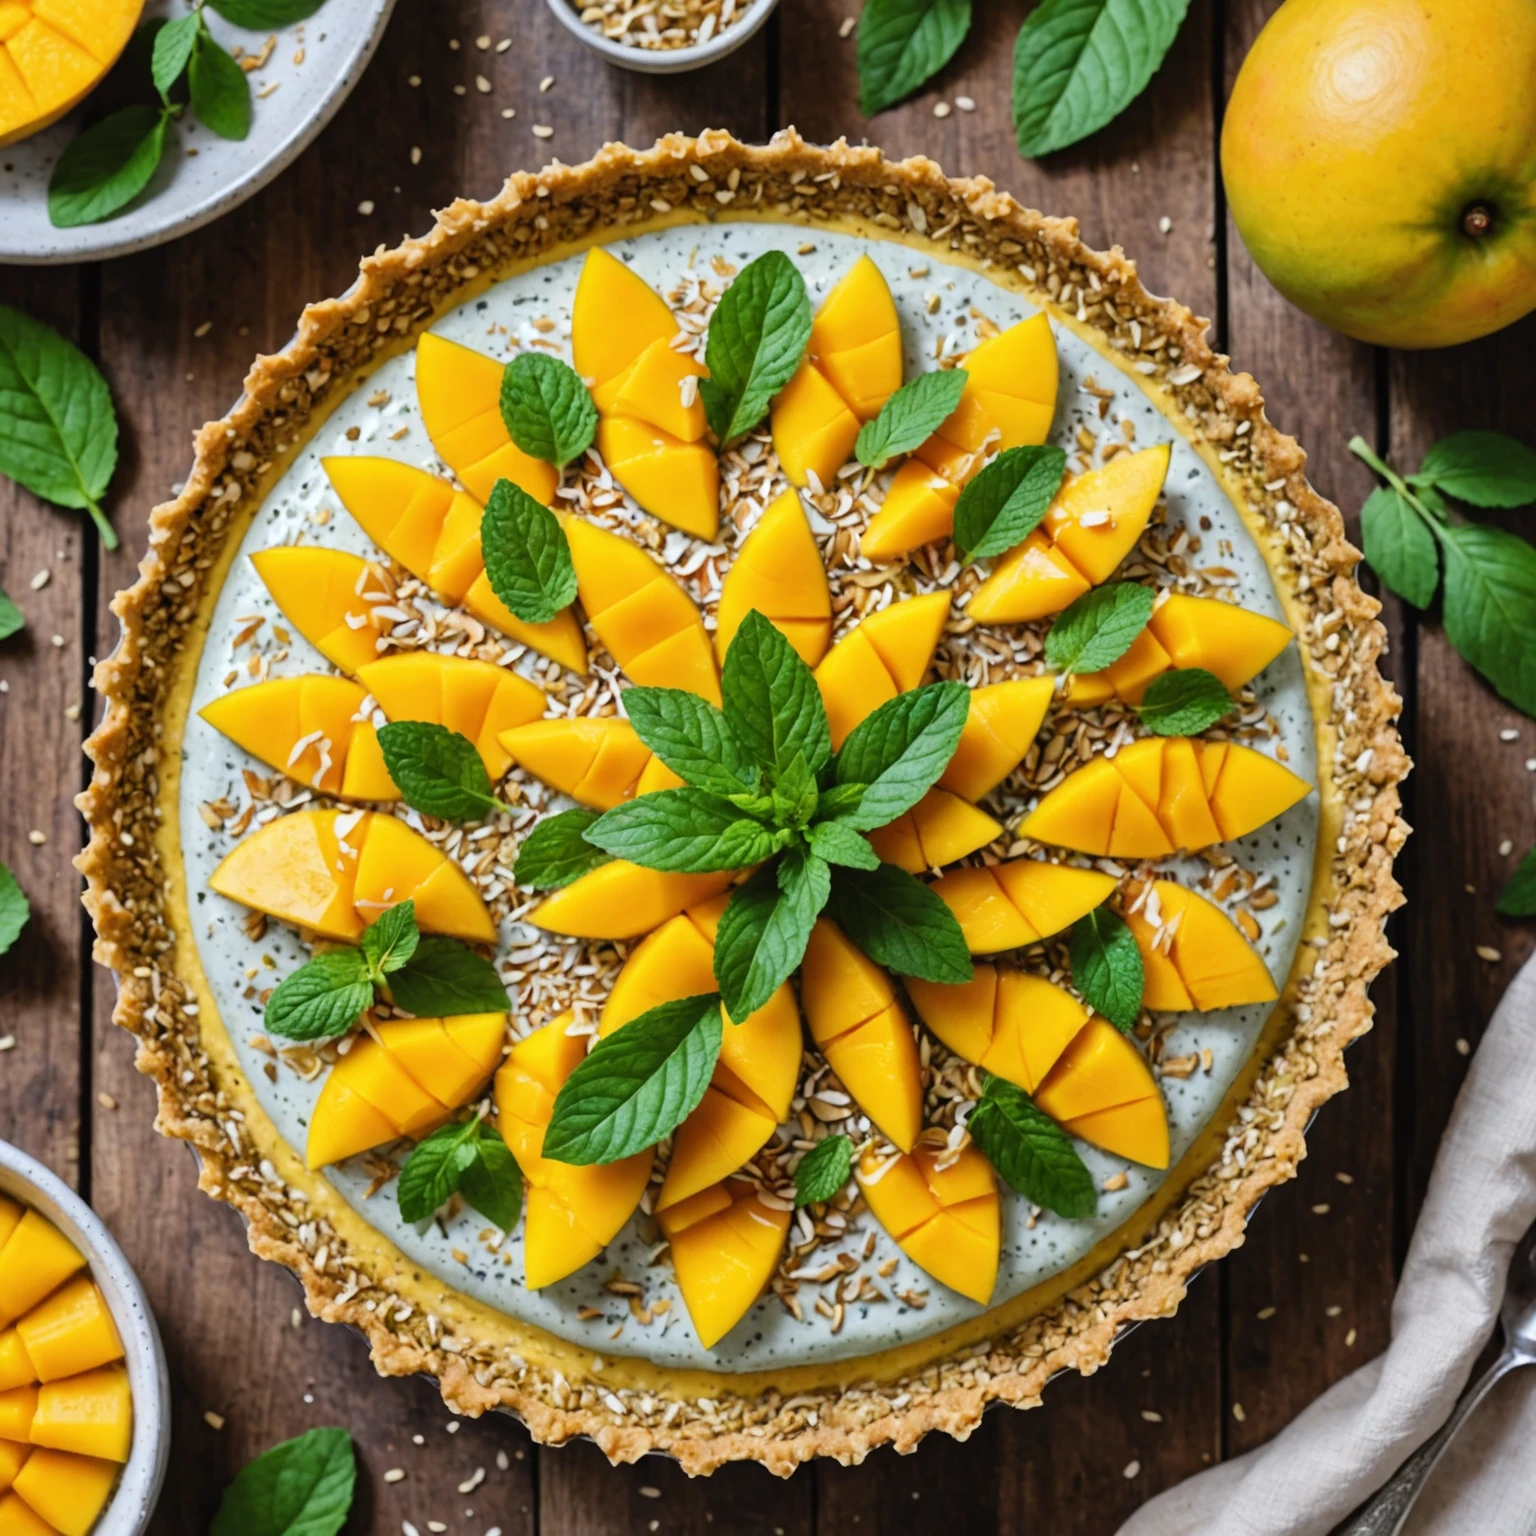
BeginnerBakes mango coconut chia pudding tart ingredients

Instructions

  1. Prepare the crust: In a medium bowl, combine gluten-free rolled oats and shredded unsweetened coconut.
  2. Add melted coconut oil and 2 tablespoons maple syrup to the oat mixture. Stir until fully combined and sticky.
  3. Press the oat mixture firmly and evenly into the base and sides of a 9-inch tart pan with a removable bottom, using a spoon or your fingers.
  4. Refrigerate the crust while preparing the chia pudding filling.
  5. In another bowl, whisk together canned coconut milk, chia seeds, 2 tablespoons maple syrup, and vanilla extract until smooth and well blended.
  6. Refrigerate the chia pudding for at least 4 hours or overnight, stirring once or twice to prevent clumps.
  7. When thickened, stir the pudding well and pour it into the chilled crust. Smooth the surface with a spatula.
  8. Arrange the thin mango slices decoratively on top of the pudding layer.
  9. Garnish with fresh mint leaves if desired.
  10. Chill the tart assembled for at least 30 minutes before serving to meld flavors.
  11. Slice and serve chilled. Store leftovers covered in the refrigerator for up to 3 days.
BeginnerBakes coconut chia pudding spread into mango tart crust

Tips

Equipment Needed

Essential tools for making this no-bake mango coconut chia pudding tart, perfect for beginner bakers: 9-inch tart pan with removable bottom: For easy crust pressing and clean tart removal. Mixing bowls: Two medium bowls-one for crust, one for pudding. Whisk or fork: To blend pudding ingredients and avoid clumps.

Ingredient Prep Notes

Gluten-Free Rolled Oats: Choose certified gluten-free oats. Quick oats can substitute but may create a softer crust. Shredded Unsweetened Coconut: Use fine shredded coconut for better texture and binding.

Oven Note

This recipe is completely no-bake, ideal for beginners or those avoiding ovens. Refrigeration sets both crust and pudding layers, making it an effortless and refreshing dessert. For beginner-friendly baked recipes, keep these tips in mind: Fully preheat oven: 10-15 minutes for even baking.

Easy Upgrade Ideas

Customize this tropical no-bake tart with these easy, beginner-friendly upgrades: Add crunch: Sprinkle toasted pumpkin seeds or chopped nuts (almonds, pistachios) on crust before chilling. Layer with berries: Add fresh raspberries or blueberries between chia pudding and mango for color and tang. Spice it up: Mix ground cardamom, cinnamon, or ginger into chia pudding for warm, exotic flavors.

Frequently Asked Questions

Can I make No-Bake Mango Coconut Chia Pudding Tart Recipe ahead?
Yes. Bake it ahead, cool it fully, and store it as directed so the texture stays as close to fresh as possible.
How do I know when it is done?
Use the timing as a guide, then check the center with the recipe's doneness cue, such as a clean toothpick, set edges, bubbling filling, or a gently springy top.
Can I change the flavor?
Yes. Keep changes small the first time, such as adding citrus zest, spice, chocolate, nuts, or a simple glaze that matches the recipe.
What should beginners watch most closely?
Measure carefully, avoid overmixing batters or doughs, and let the bake cool long enough before slicing, glazing, or storing.

Ingredient Replacements

  • gluten-free rolled oats: Use a similar baking ingredient and adjust moisture gradually so the batter or dough keeps the same texture.
  • shredded unsweetened coconut: Use a similar baking ingredient and adjust moisture gradually so the batter or dough keeps the same texture.
  • coconut oil: Use melted butter, neutral oil, or a plant-based baking stick in the same amount, knowing that flavor and tenderness may shift slightly.
  • maple syrup or agave nectar: Swap with a similar sweetener in small adjustments because liquid sweeteners can change browning and moisture.
  • canned full-fat coconut milk: Use dairy or unsweetened plant-based alternatives with a similar thickness so the batter does not become too loose.

Storage and Reheating

Cool leftovers before storing. Refrigerate in an airtight container for up to 4 days, or freeze when the ingredients are freezer-friendly.

Related Articles

Read related air fryer guides and cooking tips.

More Recipes

Explore more recipes you may like.

Reviews

Rate this recipe and share a photo of your result.

No reviews yet.

Newsletter

Stay In The Loop

Get fresh recipes, articles, and updates from Beginnerbakes.